
mAadhaar – How to Download / Use mAadhaar App on Mobile Easily! [Updated]
Do you want to Know about mAadhaar? Then you are in the right place.
Aadhaar Card is one of the most prominent Identity System in India which is used in various places like Domestic Airport, Hotels, etc.
With Aadhar being such a critical Identity it became common for many working people to always carry their Aadhar in their wallets, Bags, Purse, etc.
Especially People who use to travel a long distance every day for their job/work started carrying it most of their time.
While Travelling it is possible to misplace your Aadhaar/Wallet containing your Aadhar, lose of Card became a massive problem as these people were unable to prove their Identity.
When UIDAI came to know about this, they thought of an Electronic way of storing your Aadhaar which gave birth to mAadhaar.
Contents
- 1 What is mAadhaar
- 2 How to Download mAadhaar
- 3 How to Add your Profile in mAadhaar
- 4 How to Add a New profile in mAadhaar
- 5 Features of mAadhaar
- 6 How to Lock/Unlock Biometrics through mAadhaar
- 7 How to Check Aadhaar Authentication History From mAadhaar
- 8 How to Generate VID from mAadhaar
- 9 How to Retrieve VID from mAadhaar
- 10 How to View Updated Profile in mAadhaar
- 11 How to Show/Share your QR-Code from mAadhaar App
- 12 How to Generate and Share e-Kyc in mAadhaar
- 13 Benefits of mAadhaar
- 14 Limitations of mAadhaar
- 15 How to Delete your Profile on mAadhaar
- 16 Compatibility of mAadhaar
- 17 How to Disable Password in mAadhaar
- 18 FAQ’S
- 19 Conclusion
What is mAadhaar

mAadhaar is an Application developed by UIDAI for people to always carry their Aadhaar Card in their mobile phone. It became very convenient for people to use mAadhaar as now they can take their card in their Smart Phone.
You can add up to three profiles in your mAadhaar App and carry all the essential information wherever you go.
What do you mean by three Profile in your App as I only have one Aadhaar?
By three Profile I mean three Aadhar Card in one Mobile. For example – Let’s Suppose you Aadhaar is opened on your Father Mobile Number, i.e., your father Number was given upon the generation your Aadhar.
So Now your father can add his and your profile in his mAadhaar app. The app is fully secured with passcode which the user has to enter every time he/she opens the app. This makes sure that no one other then you can open your Profile.
How to Download mAadhaar

You can easily Download your mAadhaar app in your Android Device. If you are from iOS, then you have to wait for a couple of months as the mAadhaar app is not available on iOS App Store.
If you are an android user, then you can follow me step by step but remember to keep your Registered Mobile number sim in your Android Device.
1. Go to the Google Play Store.
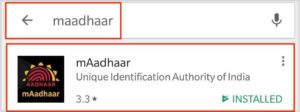
2. Search for mAadhaar.
3. Click on the mAadhaar App on the top option which has an Aadhar sign.
4. Click on Install Button, and the app will begin to install in your Device.
5. Once the Installation is complete, the App will be downloaded in your Device.
How to Add your Profile in mAadhaar

Adding your Profile in mAadhaar App is an easy task which you can do easily within minutes. Just follow me step by step, and you will realize how easy it is.
I have divided the steps in an open format to make you understand everything clearly. So without further ado, let’s get started.
1. Open your mAadhar App.

2. It will display a pop up like “Allow mAadhaar to make and manage phone calls?”, Click on Allow.
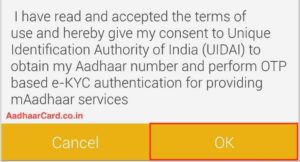
3. Then it will show you “mAadhaar Consent” which basically tells you some of its features; You can read it if you want otherwise click on “OK.”
4. Now it will display a Usage Guidelines which give you some basic guidelines, Just click on the back button.
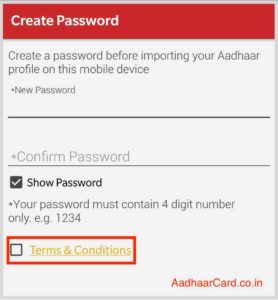
5. Now it will ask you to set a four Digit Password which you must set up very carefully.
Tip – Set a Password which you can remember easily like your Birth year or last 4 digits of your mobile Number.
6. After typing your Password, Tick Mark the “Terms & Conditions” Box and then click on Confirm.
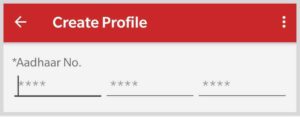
7. Now you have to type your 12 Digits Aadhar Card number and then click on Next.
8. Now it will send an OTP and auto-fetch the OTP from your message; you just have to click on “Verify.”
9. Now it will ask for a password, Enter the 4 digit Password you set up in the beginning and click “OK.”
10. Voila, you have your Digital Aadhaar Right in your smartphone.
How to Add a New profile in mAadhaar

If your Mobile Number is used in more than one Aadhaar Card, then you can add their profile along with your Profile. It is a straightforward process to add a new profile.
Today I will share with you, How you can easily Add a new profile with your Existing Profiles.
So without further ado, let’s get started.
1. Click on mAadhaar App in your Device.
2. Enter the four Digit Password to open the app fully. Now you will see your Existing Aadhar Card.

3. In the below Right Corner there is a Yellow color Plus sign, Click on it.
4. Now Enter the Aadhaar No that you want to add and click on Next.
5. Now UIDAI will send an OTP which will be auto fetched from the recent message, simply click on “Verify.”
6. It will say you to enter a password, Enter the Password that you use to open your app and click “OK.”
7. Done, Now you will see his/her profile along with your Profile.
By using the same method, you can Add one more profile and have 3 Profile in your App which is the maximum limit of the app.
How to View your Profile in mAadhaar

If you have just added your Profile in mAadhaar, then it is very easy to view your profile. Just follow the step by step procedure, and you are good to go.
1. Click on mAadhar App to open it.
2. Enter the Password to fully unlock the app.
Note – The Password is the same password you set in the start.
3. Now you will see your Profile, but now you notice that your Profile is really
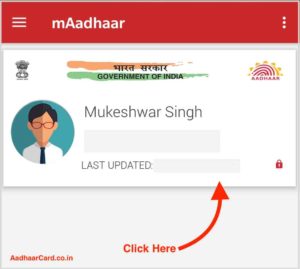
4. Now you have to Click on your small profile.
5. It will ask for a password, Enter the same password you use to open the app and click “OK.”
6. Done, Now you will fully see your Profile.
Tip – By Default, you will see the Front View of your Full profile, if you click on your Full Profile then it will show you the Back View of your Profile.
Features of mAadhaar
mAadhaar is packed with a lot of Features which can be really useful at times. It is very crucial to know about all these Features so that you can protect your Privacy at times and also learn to Use different functionality of this app.
So without further ado, let’s let started.
1. Digital Aadhaar Holder – Your mAadhar App is your Digital Aadhaar Card Holder, i.e., you can always store your Aadhar in your App and carry all the important Information where ever you go.
2. Biometrics Settings – If you feel that your Privacy is leaking or somebody is using your Aadhar Card without your consent then you can Lock your Biometrics directly from the App and can Unlock the Biometrics from the same.
Note – If you feel that someone is using your Aadhar then you must Track your Aadhaar Usage.
3. VID Generation – Virtual ID or VID card is an alternative to your Aadhar Number. You can use VID when you don’t want to give your Original Aadhar Number. With mAadhaar, you can Generate a VID Number within minutes and use that instantly.
Note – You can also Generate your VID from UIDAI official site but first check out How to Generate a VID.
4. TOTP Generator – Time-Based One Time Password or TOTP is one of the most useful features in this app. You will frequently use this feature while using some of the services in UIDAI. It is basically an alternative to OTP which can be generated within seconds and can be used instead of OTP.
5. QR-Code Shower – With this app you can show a QR Code generated by UIDAI which can be used at different places to prove your Identity.
6. e-Kyc Sharer – You can share your Electronically Know Your Customer(e-Kyc) file with your Bank or others within minutes by using mAadhaar. This App provides a direct feature to share your e-Kyc by different means like Email, Bluetooth, etc.
7. Updated Information Viewer – Let’s Suppose that you have placed a request to update your Address. As soon as you put a request, your mAadhaar will show you the updated information instantly even though the update is yet to be processed.
Note – You have to use an option called “View Updated Profile” to view your Updated Profile.
8. Aadhaar Authentication History – If you want to Know when and where your Aadhar was used, then you are looking for Aadhaar Authentication History. With this app, you can quickly check the Authentication history within seconds.
Where Can I Use TOTP?

As I said, TOTP is one of those useful features that you will come across while using a service in UIDAI. You can use your TOTP in services like:
- Changing Address Online
- Downloading your Aadhaar
- Aadhaar Reprint
- Aadhar Update History
- Aadhaar Paperless Offline E-Kyc
Whenever you are using these services in UIDAI, you can use TOTP instead of OTP to proceed in these services. It can be helpful as you don’t have to wait for OTP.
How to Lock/Unlock Biometrics through mAadhaar

Whenever you feel like your Privacy is leaking or someone is using your Aadhar then it is always a wise option to Lock your Aadhaar and Unlock it when you want to use it.
Today I will share How you can Lock/Unlock your Biometrics directly through the App which is an easy option. So without further ado, let’s get started.
How to Lock your Biometric from mAadhaar
1. Click on mAadhaar App, Enter your Password to fully open the App.
2. Click on your Profile to open it.
3. Enter your Password to unlock your Profile.
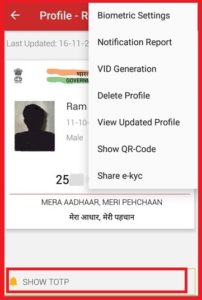
4. In the Top Right Corner, you will see three White Dots aligned Vertically, Click on them which open all the Options.
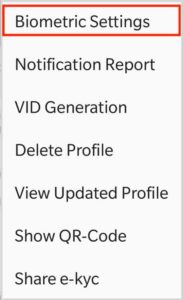
5. Click on “Biometric Settings.”
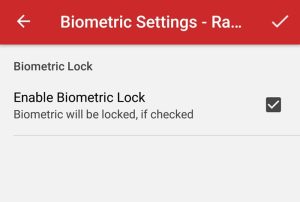
6. Now you will see an Option saying “Enable Biometric Lock” which is unchecked, Click on that Option to Check it.
7. Click on the Tick Mark on the Top Right Corner.
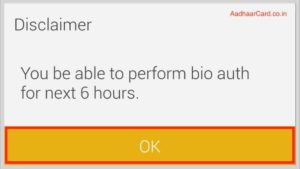
8. Now it will show a Disclaimer saying “You will be able to perform bio auth for next 6 hours“, Click on “OK.”
9. It will send an OTP which will be Auto Fetched by the App.
10. Click on “OK.”
11. Done, Your Biometrics is locked.
How to Unlock your Biometrics from mAadhaar
After you Locked your Biometrics, there can be times when you want to disable or Temporarily Turn off your Biometrics Lock.
Unlocking your Biometrics is an easy task, and I will share with you How you can do that too. So without further ado, let’s get started.
1. Click on mAadhaar App, Enter your Password to Fully Open it.
2. Click on your Profile to open it.
3. Enter your Password to open your Profile.
4. Now Beneath your Profile, you will see a Message saying “BIOMETRICS LOCKED (CLICK TO UNLOCK),” If you want to Temporarily Disable your Biometric lock then Click on that Message, Enter your Password and click “OK.”

Your Biometrics will be temporarily disabled for 10 Minutes. But if you want to Disable Biometric Lock then follow the Below Steps:
5. In your Profile, Click on three Dots on the Top Right Option and then Click on “Biometric Settings.”

6. There Untick the Option Saying “Enable Biometrics Lock” and click on Tick Mark on the Top Right.
7. Now it will show “You be able to perform bio auth for next 6 hours”, Click on “OK.”
8. It will send an OTP which will be auto-filled once the message is received on your Registered Mobile Number, Click on “OK.”
9. Done, your Biometrics is Unlocked.
How to Check Aadhaar Authentication History From mAadhaar
Aadhaar Authentication History or Aadhaar Usage History means knowing when and where your Card was used. So if you think that there is some problem with your Aadhar or somebody has downloaded your card without your content etc., then you can quickly check your all the information from this Authentication.
This History can also be checked in UIDAI official website, but having this feature in this App make it much more comfortable for us to generate the report.
So Now I will share how you can check the Usage History of your Adhar.
1. Click on mAadhaar, Enter your Password to fully open it.
2. Click on your Profile and Enter your Password to unlock it.
3. Click on the three Vertical White Dots at the Top Right Corner of the Screen.
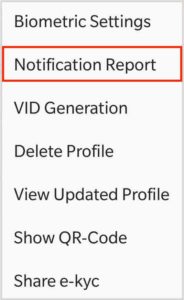
4. Click on Notification Report and wait till it load.
5. Now it will send an OTP which will be auto fetched once the message is received.
6. Choose your Authentication Type from the following Types – All, Demographic, Biometric, OTP, Demographic or Biometric, Biometric or OTP, Demographic or OTP.
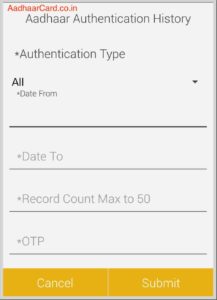
7. Choose your Date To and Date from, i.e., the period of which you want to see the History like 2 months, 4 months, etc.
Note – The Maximum is Six Months.
8. Enter your Record Count.
Tip – Set it to 50 to Obtain maximum results.
9. Click on Submit, and it will show you all the information about your Aadhar Usage.
It will show you where it was used which in most cases will be “UIDAI Online Services” and will give you the Exact Date-Time.
How to Generate VID from mAadhaar
VID or Virtual ID is a 16 Digits Number generated from your Aadhar Card. This service was made when UIDAI came to know that people are not happy with sharing their Aadhaar Number with Banks, Institutions, etc.
You can use your VID number instead of your Aadhaar Number wherever you want. And the Best Part?
No one will ever get access to your Original Aadhaar Number. Now, you can generate your VID number online, but it will take a little longer than what it takes with the app.
So I will share with you, How you can easily Generate your VID from your mAadhaar App. Without further ado, let’s get started.
1. Open your App and Enter your Password to Fully Open it.

2. Click on your Profile and Enter the Password to open your Profile.
3. Click on the three Vertical White Dots from the Top right of your Screen and click on “VID Generation.”
4. It will automatically send an OTP which will be auto-typed by the app once it receives the OTP.

5. Click on “Generate VID” and VOILA.
6. Your Virtual Id Number is Generated and Shown on your Screen; you will also get a message from UIDAI mentioning your VID as well.
How to Retrieve VID from mAadhaar
Do you want to Retrieve VID from mAadhaar? Then you are in the Right place.
After Generating your VID, you may delete the message, or something happens with which your VID message is deleted. Well, in this case, you can either Generate a New VID Number or Retrieve the Old one.
If you want to Retrieve the Old VID, then I will share How you can easily Retrieve your VID from mAadhaar. So without further ado, let’s get started.
1. Open your mAadhar App and Enter your Security Password to Open your App Properly.
2. Click on your Profile and Again Enter your Security Password.
3. Click on the three Vertical White Dots from the Top Right Corner of your Screen.
4. Click on “VID Generation.”
5. UIDAI will send an OTP to confirm that the real user is generating VID, the OTP will be auto written by the App after it receives the code.

6. Click on “Retrieve VID” and Done.
7. Your Old VID will be shown on the screen, and the message containing your VID will be received from UIDAI as well.
How to View Updated Profile in mAadhaar
Did you just placed an Update Request and wanted to see it in the App? Thankfully UIDAI has made an option called “Show Updated Profile” so you can see your Updated Profile information even before the Update is finished Processing.
It is very easy to see your Updated Profile in mAadhaar which you can too see within 2 minutes by following the steps which I am about to tell.
So without further ado, let’s dive in.
1. Open your mAadhaar App and Enter your Password to open your App.
2. Click on your Profile and Enter the Password to open your Profile.
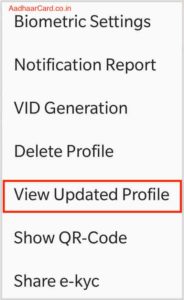
3. Click on the three Vertical White Dots from the Top right of the Screen and select “View Updated Profile.”
4. You will receive an OTP which will be automatically written by the App once the message is received.
5. Click on “OK.”

6. Now it will show a message saying “Successfully Updated the Profile” and Cheers; your Updated Profile will be displayed on the Screen.
You can now easily see all the Update Information on your mAadhar before it actually appears on Aadhar Card.

Do you want to show or Share your QR code from mAadhaar App? Then you are in the right place.
You can easily generate and share your QR Code for various reasons like security, Identity, etc., and I will share How you can easily Generate your QR Code as well. Make sure to follow me Step By Step
Without further ado, let’s get started.
1. Open your mAadhaar App and Type in your Password to open the App.
2. Click on your profile and Enter the password to open your Profile.
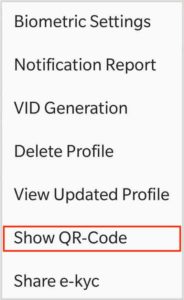
3. Click on Three Vertical White Dots from the top Right of the screen and click on “Show QR-Code.”
4. Now you will see your QR Code on the screen; you can choose to share it by clicking on “Share” from the Bottom of the Screen.
5. It will ask for Password, Enter your Password and click on “OK.”

6. Now you will see all the Different options to share your QR Code, like Gmail, Fb, Insta, Shareit and more.
7. Select your preferred Sharing Channel and all your work is done.
By following this Method, you can easily see and share your QR-Code for any purpose.
e-Kyc or Electronically Know Your Customer is the way of Electronically Resident Authentication used by Bank and different Institutions. In Aadhaar resident can submit e-KYC as an Address Proof but in an Electronic way.
You can easily Share e-Kyc with your Bank etc. by following the method I am about to share. So without further ado, let’s get started.
1. Go to your mAadhaar App and Enter your Password to open your App.
2. Click on your Profile and Enter the Password to open your Profile.
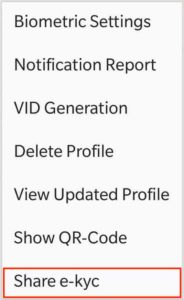
3. Click on the Three White Vertical Dots from the Top Right Section of Screen and click on “Share e-kyc.”
4. It will ask you to enter your password, enter your password and click “OK.”
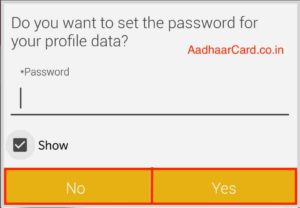
5. Now it will ask you “Do you want to set the password for your Profile data?”. If you want to set a password, then enter the Password and Click on “Yes,” otherwise click on “No.”

6. Now it will share all the Mediums/Channels by which you can share your e-KYC information like Mail, Bluetooth, Shareit Etc.
Note – It does not include Fb, Insta and some other Media which were available in sharing QR-code.
By this method, you can easily share your e-Kyc with your Banks or other Institutions.
Benefits of mAadhaar
There are many Benefits of mAadhaar which makes life a little easier. I will discuss some of those Benefits that you will get after you Download and Install mAadhar in your Device.
1. No Physical Aadhaar – The Biggest Advantage of Installing mAadhar is that you will not have to carry your Physical Aadhar Card. You know as well as I Do, How frustrating it can be to carry your Aadhaar Daily as an Identification and then it gets misplaced.
Thankfully with this App, you just have to install this app, and VOILA, you don’t need a Physical Aadhaar. Just open your App, Show your Profile and you are good to go.
2. TOTP Generation – The second most useful Feature of this App is TOTP Generation. TOTP is an alternative to OTP, so when you are using some services in UIDAI website, then you can use TOTP instead of OTP.
The Benefit is that you don’t have to wait for OTP which sometimes can be very late, instead simply open the app and Generate a TOTP which takes a second or two.
3. Biometric Locking/Unlocking – When it looks like someone is trying to use your Aadhaar Card then your privacy is at risk. You have to make sure that your Private Data is protected and it can happen when you Lock your Biometrics.
4. History Authentication – If you feel like your Aadhaar was misused or somebody has downloaded to your Card without your consent then you can check all that with the Notification report.
Locking of Biometrics makes sure that only you as the real user have access to your Private Data. You can later Temporarily or Permanently Disable the Biometrics.
5. e-Kyc Sharer – You can use this App to complete your e-KYC for Banks and other financial transaction. You can also share your e-Kyc Information with any Service Provider.
6. Q.R. Viewer – You can also view or share your Q.R. generated by UIDAI within the app. Your Q.R. will have your Information which can be seen after scanning.
Limitations of mAadhaar
By Far there is no Extreme Limitation of mAadhaar App, but one of the possible Limitations which I came upon is “Theft of your Mobile Phone.”
So let’s say You were traveling on a train when somebody ran away with your Mobile Phone, which means you are in a condition of Theft of your Mobile Phone.
Thankfully your App is Password Protected so he/she cannot open your App and have direct access to your Private Data, but if he/she by any mean get to know your Aadhaar Card Number, then he/she may have access to your Aadhar Information.
But he/she has to be smart to do that, and I don’t think he/she will think of accessing your Aadhar Information when all they want to do it sell your Phone.
But then also take cautions and get your Mobile Number Blocked to Stop all the services and protect your Privacy.
How to Delete your Profile on mAadhaar
Do you want to delete your profile in mAadhaar? Then you are in the right place.
There may be a time when you want to delete your Profile from the App. The reason can be selling your Phone, Giving your Mobile to somebody temporarily when you don’t want him/her to look at your profile.
Whatever is the reason, Deleting your Profile is very Easy and you will be able to do it in the next two minutes. Today I am going to share how you can easily delete your profile. So without further ado, let’s get started.
1. Open your mAadhar App and Enter your Password.
2. Click on your Profile and enter your Password to fully open it.
3. Click on the three white Vertical dots from the Top Right Corners of your screen.
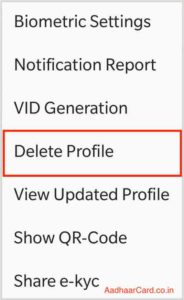
4. Then you have to click on “Delete Profile.”
5. It will ask for a password, Enter the same password you entered while opening the app.
6. Now it will ask “Are you sure want to delete your Profile?” Click on “Yes.”
7. Done Your Profile is deleted from the App.
With this way, you can Delete your Added Profile from the mAadhaar App easily. If you have more than one profile, then click on the profile you want to open and follow from step 3 again.
Compatibility of mAadhaar
1. mAadhaar is compatible with all Android Devices running Android 5.0 or Above due to security purposes.
2. mAadhar is not available on iOS till now, but the officials from Aadhaar said on Twitter that they are working on iOS and soon it will be available.
The Funny thing is that they said it on 28 January 2018 and Today is 7 December 2018, but till now mAadhaar hasn’t released on iOS. You can see their tweet from below
https://platform.twitter.com/embed/index.html?dnt=false&embedId=twitter-widget-0&frame=false&hideCard=false&hideThread=false&id=957607933147201536&lang=en&origin=https%3A%2F%2Faadhaarcard.co.in%2Faadhaar-services%2Fmaadhaar%2F&theme=light&widgetsVersion=ed20a2b%3A1601588405575&width=550px
3. You can only add your profile in mAadhaar if your Registered Mobile Number is being used in the phone, i.e., the registered number sim must be in your Mobile.
4. If you don’t have your Registered number in your Smart Phone, then you will not be able to create your profile on mAadhaar. If your Registered Mobile Number is lost or misplaced, then you have to Update your Registered Mobile Number.
How to Disable Password in mAadhaar
If you are one of those people who use mAadhaar Quite Frequently, then you know How frustrating it can be to enter Password again and again for Doing any Action. Well, there is an Option with which you can stop the app from asking for Password repeatedly.
Today I will share How you can Disable your Password in mAadhaar. So without further ado, let’s get started.
1. Open your App and Enter your Password to fully open it.
2. Click on the 3 Horizontal White Lines at the Top Left of your Screen.
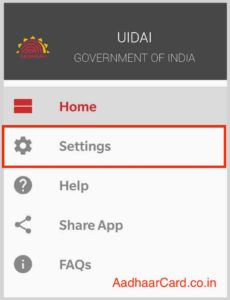
3. Click on “Settings.”
4. Now you will see a ticked Option saying “Ask Password for Every Time,” Click on it, and the Option will be Unchecked.

5. Click on the Tick from the Top Right Corner.
6. It will ask for Password, Enter the same password you entered while opening the App and Click on “OK.”
7. Done, Now you will never be asked for Password Again until you Check the “Ask Password for Everytime.”
Doing this thing will make your Privacy weaker as Anybody who has access to your Smart Phone will be able to open the App and see all the profiles without having to enter any password.
Note – It is never suggested to Disable to Password as it can be a threat to your security.
FAQ’S
Q. How to Download mAadhaar?
A. You can Download mAadhaar from Google Play store by searching for the app, or you can check out How to Download mAadhaar.
Q. How to get mAadhaar?
A. You can get mAadhaar from Google Play store by searching for the App. If you are from iOS, then you have to wait for sometime as this app is not available on iOS App Store.
Q. How to Reset mAadhaar Password?
A. If you are not able to open the app then you cannot reset the App, instead, go to Settings>Applications>mAadhaar>Storage>ClearData>Ok. Following this procedure Will reset all the data within the app, and you can again Add your Profile in mAadhaar.
The other option is to delete your App and then reinstall it which too will reset all the data, and you have to add your Profile.
Q. How to Download mAadhaar on iPhone?
A. You cannot download mAadhaar on iPhone as till now it is only available on Android App Store. You have to wait for sometime before it is released on iPhone.
Q. How to Generate mAadhaar TOTP?
A. To Generate your TOTP in mAadhaar:
- Open mAadhaar and enter your Password.
- Click on your Profile and Enter your Password to open it.
- Below you will see an option saying “SHOW TOTP,” Click on that.
- Now it will show you your TOTP.
Q. How to Download mAadhar app on Android Phones?
A. You can download mAadhaar on your Android Device by-
- Go to the Google Play Store.
- Search for “mAadhaar.”
- Click on the first option with the Aadhaar Logo.
- Click on Install
- Done
Q. How to reset mAadhaar App Password?
A. If you are not able to open the app then you cannot reset the App, instead, go to Settings>Applications>mAadhaar>Storage>ClearData>Ok. Following this procedure will reset all the data within the app, and you can again Add your Profile in mAadhar.
The other option is to delete your App and then reinstall it which too will reset all the data, and you have to add your Profile.
Q. How to Unlock mAadhaar?
A. You can unlock mAadhaar by Entering the password you set up in the Beginning when you were setting up this app in the beginning.
Q. How to get mAadhaar Password?
A. You can not get mAadhaar Password once you forget/Lost it. You can set up the password in the beginning and can change it only if you know the previous password.
Q. How to Install mAadhaar App?
A. To install mAadhaar App –
- Go to the Google Play Store.
- Search for “mAadhaar.”
- Click on the First Result with the Aadhaar Logo.
- Click on Install, and it will begin installing.
Q. How to Create mAadhaar Password.
A. You can create mAadhaar Password by opening the App. When you open your app for the first time, it will ask you to enter a password, and that is when you will create your Password.
Q. How to Change mAadhaar Password?
A. You can Change mAadhaar Password by following these steps:
- Open mAadhar and enter the password to open it.
- Click on 3 Vertical White Dots on the Top Right Side of the Screen.
- Click on “Reset Password”
- Enter your Old and New Password and click on “Reset Password.”
- You will see a message saying “Your Profile is Successfully Updated.”
Q. How to install mAadhaar app on iPhone?
A. You cannot install mAadhaar on your iPhone as this app is not available on iOS app store till now.
Q. How to Download mAadhaar on PC?
A. You can install mAadhaar on PC by following these Steps:
- Go to Google and type “Download mAadhaar for pc.”
- Click on any site you want but Go to first or second as it is the most relevant.
- Click on “Download,” and it will begin downloading.
- After Download the App, Install it.
- Done.
Q. mAadhaar is not Working?
A. If mAadhaar is not working properly then first try going to Settings>Apps>mAadhaar>Storage>Clear Data and most probably it will start working.
Otherwise, try Uninstalling and then Installing the Application. If that too didn’t work worked then go to the Review Section of this App and Comment out your Problem.
Q. Is maadhaar Safe?
A. Yes, In a majority of the problems it is safe as you can not open the App without entering a password, you can not reset the password without opening the profile, you cannot reset the password without knowing the old password.
All these things make this app safe, but if this app has a Bug, then it may become unsafe for the Victims, the probability of which is low.
Q. maadhaar your device is rooted?
A. If your Android Device is Rooted, then it will show a warning saying that your Device is Rotted which will stop this app from running. Now, you have two options
- Unroot Your Android Device, and it will work flawlessly
- If you don’t want to unroot then Go to Google and Search- maadhaar not working in a rooted device. You will find various answers to your problem.
Q. maadhaar to download your Aadhaar?
A. You can use mAadhaar to Download your Aadhaar Card with the Help of TOTP. You can use the TOTP instead of OTP to download your Aadhaar Card.
Q. mAadhaar Unable to get a response?
A. Don’t worry it is a temporary problem. When you want to see your Profile or do something from the app, then it sends UIDAI a request, and if due to high Traffic UIDIA is not able to send a response then the app shows “Unable To Get Response.”
Q. mAadhaar failed to Request Error?
A. Don’t worry it is a temporary problem. When you want to see your Profile or do something from the app, then it sends UIDAI a request, and if due to any problem (Like Internet) the app is unable to send UIDAI a Complaint then it will show an error saying “Failed to Request.”
Q. mAadhaar not able to create Profile?
A. If you are not able to create a profile, then please check that you have the registered Mobile number in your phone otherwise it will not be able to verify your identity thus not letting you create a profile.
Q. mAadhaar vs. DigiLocker?
A. mAadhaar is an app specifically designed to transform your Aadhaar into e-Aadhaar by which you don’t need to carry your Original Aadhaar always whereas DigiLocker is made to keep all your issued documents securely in an Electronic Form.
You can also keep your Digital Aadhaar in Digilocker, but you cannot keep any other thing in mAadhaar except your digital Aadhaar. Both the Apps are released by the Government.
Q. Is mAadhaar Valid Proof for Enterting Airport?
A. Yes, you can use mAadhaar as a Valid Proof for Entering Airport without any problem.
https://platform.twitter.com/embed/index.html?dnt=false&embedId=twitter-widget-1&frame=false&hideCard=true&hideThread=false&id=926291849685241856&lang=en&origin=https%3A%2F%2Faadhaarcard.co.in%2Faadhaar-services%2Fmaadhaar%2F&theme=light&widgetsVersion=ed20a2b%3A1601588405575&width=550px
Q. mAadhaar App Not Working?
A. If your mAadhaar App is not working then first Try Rebooting/Restarting your Device. If that doesn’t work then go to Settings>Apps>mAadhaar>Storage>Clear Data which will clear all data and you will have to re-verify your Aadhaar Profile.
If the problem Continues then go to the App Store and Review/Comment your Problem under the App.
Q. mAadhaar Error While Fetching Data?
A. Don’t Worry it is a temporary problem which might occur due to heavy load on the Server. It will be repaired within an hour.
Q. m Aadhaar App Password Example?
A. m Aadhaar App Password Example can be 1234, 4321, 9012, etc.
Q. Is it necessary to bring a physical Aadhaar card in a railway station?
A. No, you can now use mAadhaar App to Verify your identity instead of Physical copy.
Q. What if I lost my Mobile with the mAadhaar App Installed?
A. Your mAadhaar App is fully password protected, and no one except you can open the App. But still, If you have lost your Mobile with the app installed, then it can be a threat to your privacy.
Well, I think your mAadhaar is pretty much safe because that person would need the Password to open the app. There is no reset password for a reason that no one could reset it. It that person decided to reinstall the app then he/she must know your Aadhaar Card number and if he/she didn’t know then you don’t need to worry.
But be sure to file a complaint and block your sim card to be super protected towards your Privacy.
Note – If that person knows your Aadhaar Number then he/she can have access to your Private Information.
First, file an FIR and then take that FIR to the nearest service provider to block the Sim. Now even if that person Knows your Aadhar Number then also he/she can not open the app.
Q. Is the mAadhaar app valid at Indian airport for domestic flights?
A. Yes, you can Take mAadhaar App as a Valid Proof at Indian Airport for Domestic Flights.
Q. Can we use the mAadhar app for all identity verification purposes instead of carrying the physical Aadhar card?
A. Yes, for most of the Identity Verification Purposes you can carry your mAadhaar App instead of Physical Aadhar Card. But in places where you have to give a copy of your Physical Aadhaar, then there you can not just show your profile from the App.
Q. How do I see the TOTP number when I download my Aadhaar card online?
A. To see your TOTP Number follow these steps:
- Open your mAadhaar App and Enter your Password to Open it.
- Click on your Profile and again Enter the Password to open your Profile
- Below you will see an Option saying “Show TOTP,” Click on that.
- Now you will see your TOTP.
Q. Is the mAadhaar allowed at hotels and airports if one shows it from their mobile?
A. mAadhaar is allowed in allowed in Airports and Railways, but it may not be acceptable in Hotel as they like to Keep a copy of your Aadhaar Card as Security. It can depend from Hotel to Hotel and their Policy.
Q. Can we Add a Profile in mAadhaar without my Registered Mobile Number?
A. No, you cannot Add your Profile in your mAadhaar App until and unless you don’t have your Registered Mobile number in your Device. In case your Registered Sim is in another Mobile then trying installing the App in that Mobile or simply put the sim in yours.
Q. Can we use mAadhaar for Offline KYC?
A. For Offline KYC you must use Aadhar Paperless Local e-KYC instead of mAadhaar App.
Conclusion
In this Post, I talked about mAadhaar and all its functions. How mAadhaar makes your life a little easy by storing your Aadhaar Digitally. How to Download mAadhaar, How to use different Functions within the App like Biometrics Setting, Aadhaar Authentication History, e-KYC, VID Generation, QR Code, How to Generate TOTP and where you can use it, and more. I also talked about the Benefits and Limitations of mAadhaar App. If you have any query, then be sure to comment it down and if you like this post then do share it with your friends and Family.